Monday, October 18, 2010

Trick or Treat!

I have another Halloween project for you today - I decided to make a little matchbox candy holder with a surprise! Here's the outside of the box, top view:

SendMeASignBugg1a
I used Send Me A Sign Bugg, altering her a bit for Halloween! Using Photoshop Elements 8, I erased out the solid white portion of her dress and layered a spider web design behind it (the web was a freebie from the Tiddly Paper Craft Planet group), then I added a sentiment with a little hanging spider. The font is SNF Goody and the spider is from DB Boo Ya.

I colored her with Copics, Stickled her wings, and added a few rhinestones also colored with Copics. Lastly she was cut out and mounted with foam boosters.

Down at the bottom you can see there's a handle to pull the drawer out, and here's what the front of the handle looks like:

SendMeASignBugg1b
I cut out a bone from DB Boo Ya 2 times with my Cricut and glued them together for strength. Then I fashioned a handle from a thin strip of black cardstock and glued the bone to the front.

And here's the surprise on the inside: a little ghost pops out when you open the drawer!

SendMeASignBugg1c


I have to admit that the idea wasn't mine - I came across a pop-up match box while blog surfing!

I cut out a ghost also from DB Boo Ya (love this font!) 3 times, putting 1 through the printer to get the "boo!" on the bottom (also using SNF Goody), then glued all 3 together. Since it's going to be repeatedly shoved into the box, I wanted it to be really strong. Next I cut a strip of acetate 5" x .5" and scored it every half inch. I accordian folded it to make the pop-up mechanism and glued it into the box bottom and to the back of the ghost.

The whole thing was designed in Make the Cut. I also designed the divider to hold the 2 pieces of candy away from the pop-up portion.

This project is for the following challenges: I hope you like it and TFL!

Saturday, October 16, 2010

October Friends of WMS Blog Waltz

Hey everybody! I'm so excited to be playing in my first Friends of Waltzingmouse Stamps Blog Waltz! This month the theme is Autumn/Harvest creations. If you'd like to check out all the participating blogs, you can find the links HERE.

For my project I decided to do another luminaria like the one I did last year.

The embellishing on the opposite sides is the same. Here's one design:

Labels4 1a
And the other design:

Labels4 1b
I redid the file with Make the Cut, adjusting the oval cut out to fit with the stamp I used from Very Vintage Labels No. 4. I stamped the image 4 times, cut them all out with the corresponding Nesties die, and hand cut out the insides of each. I inked all the inside and outside edges of each piece, glued a little leaf print vellum to the backs and added glitter over the thin outer line of the image.

I glued all the images to the box base and then did all the embellishing. The flowers are from Prima and I added a flattened bead cap sprayed with Memories Mist (so they wouldn't be so bright silver) and a 1/4" brown cardstock punch to each. The leaves are also Prima, the branch punch is McGill and the bitty rhinestones are from eBay. For the other side, I hand dyed seam binding with several colors of Distress reinkers and added a button tied with rustic twine.

I also changed the cutting file so that I could use 2 sheets of this 6x6 patterned paper I really like that I found in my stash. The final alteration was an insert I made to hold the votive candle in place. It keeps the candle right in the center of the box even if you move it around. You can see it here:

Labels4 1c

Here's how it looks with the candle turned on:

Labels4 1d
Other Challenges: I hope you like it and have fun with the rest of the Waltz!

Friday, October 15, 2010

YNS Surprise Blog Hop!


Welcome to the Your Next Stamp SURPRISE BLOG HOP! If you didn't arrive here from Chris' blog, please CLICK HERE to go to Karen's blog and begin hopping! The hop starts today (Friday, October 15th at 9:00 EST) and ends on Sunday, October 17th at midnight (EST).

So what's this surprise hop about? Well....if you've popped by any of the YNS DT's blogs this week, you may have read our posts about today's very special hop showcasing a VERY special, NEW and EXCLUSIVE YNS stamp! The DT have been "in the know" about a secret project involving YNS and ScrapFest for a little while, and now the day has finally come when we can officially announce the proud news that Karen was approached by Lisa (owner of ScrapFest in Ontario) to design an exclusive YNS stamp for this autumn's ScrapFest (October 15-16, 2010) - YAY!!

Here's my project using this adorable stamp (a little sticky note holder):

ScrapFestPostItHolder

This stamp will be available to buy from the Your Next Stamp booth at ScrapFest Ontario, but fear not if you can't get along to ScrapFest as Karen is also selling this fabulous stamp in the YNS online store!! IMPORTANT: This stamp will only be available to buy online for the duration of ScrapFest, so do not delay in placing your order! As it is only available for a very limited time, Karen is offering the stamp at a very special price of $6 with FREE SHIPPING*!! (* Free shipping only applies to the ScrapFest stamp. If you include other items in your order, you will be charged shipping accordingly).

If you are able to attend ScrapFest this weekend, don't forget to print out this voucher and take it along to the YNS booth to receive 10% off your purchase of YNS stamps:


(Click on the voucher to open it in new window ready for printing)

Now you can continue on by hopping to Beth's blog. Be sure to complete the hop as we have a prize draw at the end where you can enter to win one of these gorgeous and exclusive YNS ScrapFest stamps. [If you purchase one of these stamps and then find you are the lucky winner of the prize draw, you will be given a $6 gift certificate to spend at the store instead.] The lucky winner will be randomly chosen on Monday, October 18th.


Thanks for hopping with us today!

Thursday, October 14, 2010

Really Reasonable Ribbon Challenge

Your Next Stamp is sponsoring the Really Reasonable Ribbon Challenge (create a Halloween themed card or treat bag) and I was lucky enough to get to play along with their DT! They generously sent me a whole package of different ribbons and I picked 3 to use with my treat bag. Here it is:

FhionaEasterBunny2a
I know you can tell the jute string on the top is one of them, but what about the other 2? Of course the only other possibilities are the pumpkins and their leaves! I just cut 2 pumpkins off the string, colored the stems with a brown Copic marker, and glued a single leaf to the back of each. I think they're such cute little embellishments!!

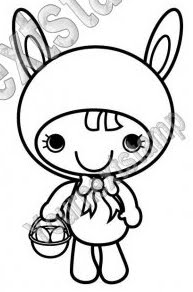
BTW, did you also notice anything interesting about the stamp I used? Recognize it as another alteration of Easter Bunny Fhiona?


I altered her once before and had such fun that I knew I had to try it again! I stamped Fhiona, colored her with Copics and cut her out, leaving off the bunny ears and basket. Then I just drew a simple pair of cat ears, colored and cut them out and stuck them on the back of her head. To really make her into a cat, I cut little bits of black sewing thread and glued them to her face for whiskers.

Here's a close shot so you can see her a little better:

FhionaEasterBunny2b
Final details - I created the bag with the Make the Cut software and the grass on the bottom was made with a Die-Namics die from My Favorite Things.

This is also for the following challenges: We'd love for you to play along! You could win a $10 gift certificate for YNS or Really Reasonable Ribbon! Please see their challenge post for all the details. TFL!

Tuesday, October 12, 2010

Your Next Stamp Challenge #27

Your Next Stamp Challenge

Yay! I have another Your Next Stamp Challenge today! Before I get to it though, I wanted to make sure you all saw this post on Karen's blog - a very interesting read!

This time around, our challenge was chosen by Beth and is "Nicely Negative" - stamp your image using white ink on black or other dark cardstock. Check out the Challenge Blog for lots of awesome samples and ideas on different ways to get the look!

Here's my card outside:

FhionaHappyHalloween1a
I used the Happy Halloween Fhiona set and a sketch from Taylored Expressions.

I stamped the skull image with Papertrey's white ink on a piece of black patterned paper, let dry thoroughly and cut it out with a rectangle Nestie. All the paper edges were distressed with the edge of my scissors and I also sponged a little white ink on them as well. The spider strip was cut from another piece of PP and the border was done with a Martha Stewart punch. I cut the BOO letters with my Cricut and covered them all with black Stickles.

Here's the inside, part 1:

FhionaHappyHalloween1b
I got the idea for the framed pop up from an *awesome* blog I recently came across called Extreme Cards and Papercrafts. You all really need to check it out. Seriously.

The Haunted House is from the Paper Doll Dress Up cartridge and the bats are from the Doodlebat font Boo Ya. I brought the house image into Make the Cut and did all my designing there (did I mention how much I LOVE this software?!). After I cut out the pop up piece, I stamped the sentiment from the same set in white ink and used a little bit of sponge to smear it around a little. I also smeared white ink all over the rest of the piece too to look like a cloudy, misty night. The hanging bat has yellow Stickled eyes and is hanging by a bit of black sewing thread.

And finally, the inside, part 2:

FhionaHappyHalloween1c
I just did a zig zag stitch all the way around, distressed the edges and stamped the little spider. The final touch was to add black brads in all the corners to hide the wonky stitching there.

Other challenges: We hope you'll play along with us! One lucky participant will be drawn at random to win $10 in YNS Stamp Bucks!! You don't have to use YNS images on your card, but if you do you'll get a double entry in the draw!

Also, the challenge hostess will choose her favorite card, and that winner will get the YNS Challenge "Top Pick" blinkie to proudly display on their blog PLUS $5 in YNS Stamp Bucks! You must use a YNS image to be eligible to be chosen for Top Pick.

Full details can be found at the YNS Challenge Blog. TFL!

Friday, October 8, 2010

Coffee Leslie

Hey all! I have a card featuring a company that I just recently found out about called Karber Digital Images. They have the cutest little girl digi stamps! My fave is definitely Leslie (I love that she wears glasses like me!), but I also heart Millie, Jenny and Layla too! I used to not be much of a digi stamp fan, but it's companies like this that are quickly converting me!

Since I'm using a Karber image, I decided to play in their Weekly Challenge, which is to Go Digital. Here's my card:

CoffeeLeslie1a
I printed Leslie out and colored her with Copics. Her mug is paper pieced with a little bit of scrap left over after I cut out the frame. I also cut out extra little steam puffs and hands to layer over the mug for realism. As you can see from the glare, I covered her glasses with clear dimensional adhesive.

For the frame, I imported the Snwflake design from the Lacy Labels cartridge into Make the Cut, and reconstructed the innermost frame so that it wouldn't have all the attached snowflakes (I just wanted a plain inner frame). Then I cut all the pieces with my Cricut and glittered the pink inner frame. You might not be able to tell, but I glued the piece that Leslie's on directly to the background paper, and then the frame is popped up with foam tape. Leslie is also attached to the background with a bit of foam tape.

Lastly, I cut out 3 snowflakes each from Doodlebug Sugar Coated cardstock and clear acetate. I layered them together, poked holes, and tied them together with a little Timeless Twine.

Here's a close shot so you can how nicely the Cricut cut out these delicate snowflakes (I was impressed that it handled the acetate so well!):

CoffeeLeslie1b

The patterned paper is really old Love, Elsie paper and the sentiment is from Papertrey.

This card is also for the following challenges: I hope you like it and TFL!

Thursday, October 7, 2010

YNS Christmas New Release Blog Hop!


Hello everybody! Thanks for joining us for another fun and fabulous Your Next Stamp Blog Hop! YNS just released over 25 new holiday images so the Starlets (and our awesome guest designers!) have whipped up some eye candy using many of the new images.

If you came here by way of Jenny's blog, then you're on the right track! If not, please go back and start at Crystal's blog because you won't want to miss a stop! Not only are there amazing projects for you to drool over, but there are also super prizes!! At the very end of the hop, there will be a chance to win the grand prize surprise new release package. BUT don't go directly there yet because there are also several stops on the hop with mini candy draws - you'll have to keep hopping to find them all!

By the way, there's also a 15% off sale during the duration of the hop so you'll be able to go shopping for all these new releases, and other stuff too if you'd like!

*****And now on to the show!*****

For my first project, I have a card using the adorable Merry Mouse Eve:

MerryMouseEve1
I stamped the image on white cardstock and colored with colored pencils and odorless mineral spirits. Next I masked off the image and airbrushed the background with Copic markers. My last marker spit big spots in areas so I decided to cover them up by sewing on seed beads everywhere to represent falling snow.

The background was embossed with a Spellbinders snowflake plate and then I attached tiny snowflake punches with sewn seed bead centers. Finally I added some white satin ribbon and some hand dyed seam binding.

For my second project, as soon as I saw the little Christmas lights in the Light up the Holidays set from our new designer Heather, I had an idea to do a fireplace strung with a garland and lights and after many hours of designing with Make the Cut, I came up with this:

LightUpHolidays1a
It's basically a box that opens at the top so you can stick a battery powered tea light candle in to light it up. There's an insert in there so that the light stays right behind the fire even if you move the fireplace. I also designed a stencil to sponge all the bricks on and I even designed the little fire!

For the garland, I just punched out the little fern from a few different shades of green cardstock, and then hit them with a little green ink on a stencil brush so they weren't so flat green. To get them in the garland shape, I actually stamped the larger light string from the set, then just cut around the "string" to get a base to glue on my fern branches. Then I stamped the little lights twice, colored eight of them with Copics, cut them out and covered just the bulb portions with clear dimensional adhesive. Finally I glued the lights behind the garland and added 2 little bows of red baker's twine.

Here's a shot so you can get an idea of what it looks like with the tea light on:

LightUpHolidays1b
I hope you liked my projects and thanks for hopping along with us! Your next stop is our incredibly talented October Guest Designer Tori.