Tuesday, June 29, 2010

La-La's Weekly Wednesday Challenge #45


It's time for another La-La's Weekly Wednesday Challenge! This week our theme was chosen by Kim and is to "Try something new." Kim wrote, "this can be a new technique you have been dying to try but haven't had the time, a new card shape, some handmade embellishments...maybe even altering images if you haven't tried it yet!" Well, I've been stamping a REALLY long time so it took me a while to think up something I haven't tried yet, and then I remembered a background coloring technique that I've seen on a few blogs and decided to go for it! Here's what I came up with:
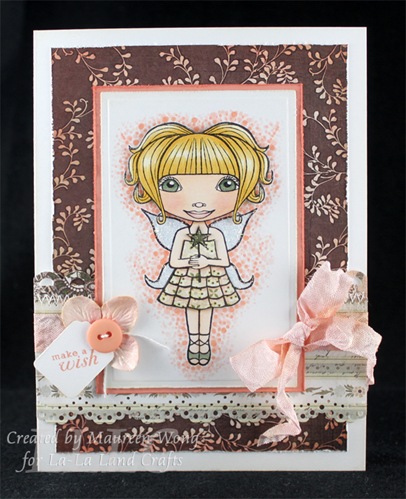
LalaFairy5
One of the blogs where I've seen the spotted background is Crissy Armstrong's and she even has a video tutorial on how to do it! It's not exactly how I would have wanted it, but I think it's not bad for a first try! I'll have to practice to get it perfect!

I used Fairy Lala (yes, again! I can't help it - I just love her!) and a sketch from OCC. I paper pieced Lala's dress and colored the rest with Copics, except her wings and wand, which were Stickled. I did the background first then made a mistake coloring her face. Not wanting to do the background over, I just colored another face, cut it out and put it over the first to hide my mistake!

Another new thing I tried this week is the hand-dyed and scrunched seam binding (I also used it on the card posted yesterday). I just cut approximately a yard off the roll, then dampened it and dyed with 2 colors of Distress reinkers, painting the colors in different areas for a variegated look, and scrunching up the ribbon to my liking. I LOVE how it came out and now want to use it on every card I make! I also dyed the Prima hydrangea with the same 2 colors to match the ribbon. I hope you like it!

Before I go, I want to let you know that whatever image the hostess uses on her project is 20% off for the week of the challenge, and this week it's Banjo Maya! And since we have the requirement that you must use a La-La Land Crafts image on your projects to win the $10 credit or Top Three, don't forget that we have all these fabulous digi images available!

We'd love to have you play along with us! All the details can be found on the La-La Land Crafts blog. TFL!

Monday, June 28, 2010

To Risk

Today's card was made for the Waltzingmouse Sketch Challenge:

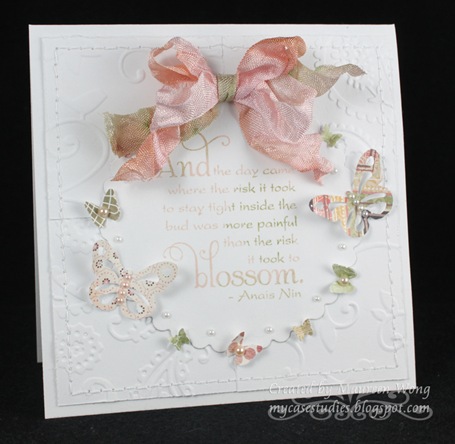
When I first saw the sketch I thought there was no way I could do it, but then an idea popped into my head and here's what I came up with (you can click to enlarge to see all the detail):

ToRisk1
The sentiment is called To Risk and is from Verve Stamps. I got out my super old (and discontinued) Mostly Animals stamp positioner (which is a fixed positioner so you can stamp your image multiple times without worrying about it moving) and stamped the sentiment in blush ink, then smeared a little olive ink on parts of the stamp with my finger and stamped again. It might have been easier just to ink my stamp with the 2 different inks at once, but I was worried that the colors would mix and get muddy. I knew doing it in layers this way would keep the colors separate and clean.

The 2 bigger butterfly punches are both Martha Stewart and the tiny one is a Fiskars hand punch. The ribbon is hand-dyed and scrunched seam binding that I've been seeing everywhere and had to try! I love the results so you'll be seeing a lot more of this stuff on my cards from now on, especially since the roll came with 100 yards!! I hope you like it and TFL!

Thursday, June 24, 2010

Cupcake Girl

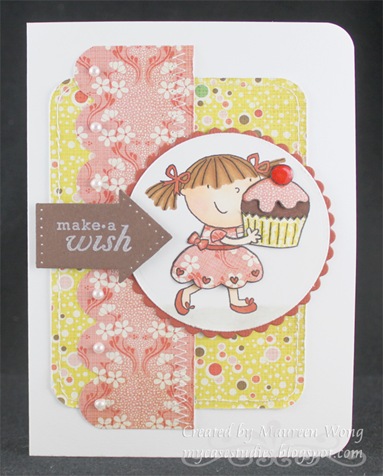
Today's card was made for the Squiggle Stamps monthly challenge which is themed "Birthday Best." Here's what I came up with:

CupcakeGirl1a
I used Cupcake Girl and a fun sketch from CPS.

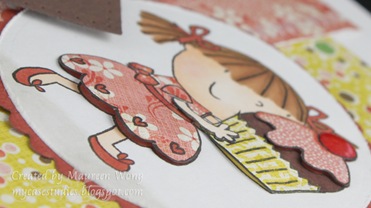
I stamped Cupcake Girl and colored her mostly with Copics. Her dress was paper pieced as was the cupcake liner and frosting/cherry. I colored the hearts and ribbon on her dress and also the cherry with a dark Copic marker - you can barely tell there's patterning under those parts! Then I did a tiny bit of highlighting on the cherry with a white pencil and covered it with clear dimensional adhesive for shine. I popped up the bottom of her dress as well as the pieced parts of the cupcake with bits of scrap cardstock. I also stamped, colored and cut out an extra arm to go over the pieced dress and cupcake liner.

If you look really closely at the scalloped piece of patterned paper, you'll see that there are floral parts and dotted parts. I carefully paper pieced her dress so it was completely made out of the floral part, and the frosting on the cupcake was made from the dotted part to look like sprinkles.

Here's a close shot so you can see the detail and dimension better:

CupcakeGirl1b
I finished off the front with a Quickutz arrow that has a piercing on either end, a bunch of straight and zigzag stitching, and half pearls on the scalloped piece.

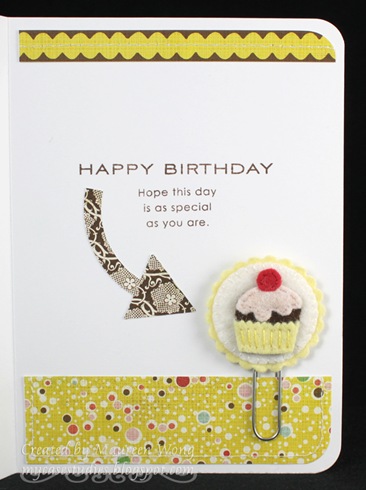
I don't always do it, but for this card I decorated the inside as well because there's a surprise for the recipient:

CupcakeGirl1c
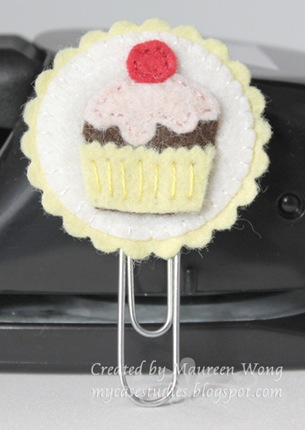
I made a matching cupcake paper clip as a little birthday giftie! I used the cupcake from the stamp as a pattern for my felt cupcake and threw in a bunch of stitching to give it a little more detail. Then I sewed the cupcake and a few layers of base felt to a large paperclip.

Here's a shot of just the clip:

CupcakeGirl1d
I hope you like it and TFL!

Tuesday, June 22, 2010

La-La's Weekly Wednesday Challenge #44

If you're looking for the Your Next Stamp Challenge #19, it's the post directly below this one. Thanks!

* * * * * * * * * *


It's time for another La-La's Weekly Wednesday Challenge! This week our theme was chosen by Jane and is WHITE - white cardstock, designer paper, ribbon, embellishments, etc. If you're not quite sure what we mean, pop on over to the La-La Land Crafts blog and check out all the DT samples - everybody did such a great job with this challenge!

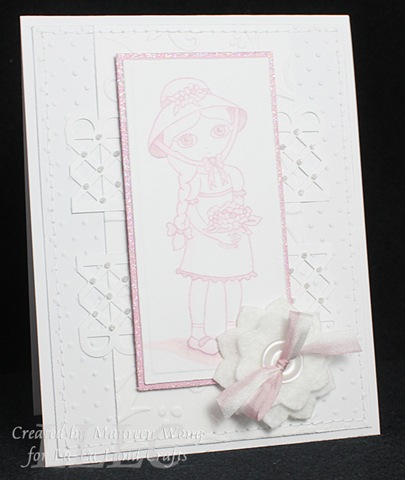
I wanted to go as white as possible and here's what I came up with:

RosieEasterDress1
I stamped Easter Dress Rosie in a light purple ink and then colored just certain parts of her with 2 different light purple Copic markers. 2 of the base pieces were embossed with Cuttlebug embossing folders, and the 2 strips were punched with a Martha Stewart punch. I then sewed on some white seed beads and glittered the edges of the purple panel. Finally, I die cut 2 sizes of flowers from felt, and sewed on a button with a piece of silk ribbon which was colored halfway with a purple Copic.

The sketch is from Cute Card Thursday.

Before I go, I want to let you know that whatever image the hostess uses on her project is 20% off for the week of the challenge, and this week it's Happy Maya!

We'd love to have you play along with us! All the details can be found on the La-La Land Crafts blog. TFL!
Your Next Stamp Challenge #19

Your Next Stamp Challenge

Yay! I have another Your Next Stamp Challenge today! But before I get to it, I wanted to let you know that a bunch of the YNS stamp sets are being retired so they're on SALE right now, all at 35% off!! Quantities are very limited, so you'll want to hurry over and grab them up while you can!

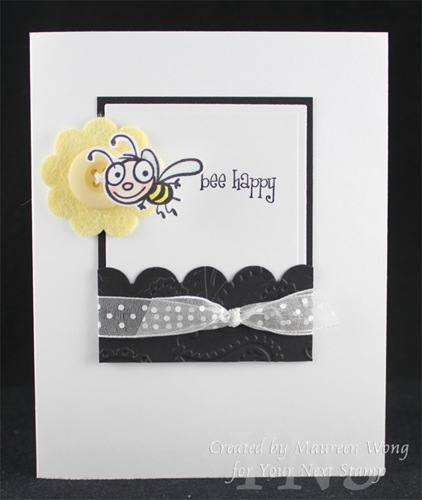
And now back to the challenge! Our hostess is Amy and she challenged us to use printed/patterned ribbon. Here's my card:

BeeStings2a
I really loved the hovering bee that I did on this card so I did a similar treatment on today's card. I used Bee Stings (and a sentiment from Mini Greetings) and made a slight change to the acetate piece that holds the bee - I accordion folded it so it springs!

You may remember this card where I put the dog's head on a wire spring to make it bounce around. Well I had a pretty difficult time finding just the right wire and the right object to wrap it around to make a good spring. So I had an idea to make a spring out of the acetate strip instead of wire and it worked!!

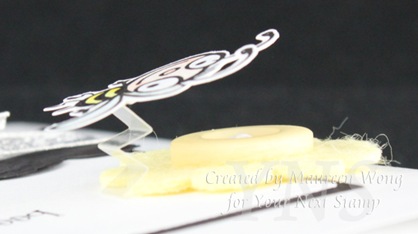
Here's a close shot so you can kind of see what it looks like:

BeeStings2b
I just cut a thin strip of acetate and folded it back and forth a few times. One end was stuck to the back of the bee and the other end was glued under the felt flower. It springs really great - I'm so happy with it! Also, you can smash it down to fit into an envelope, and when it's taken out it will spring right back up! I'm having so much fun flicking it and watching it spring around! =D

I used FTL #95 from the Clean & Simple Stamping blog and this card is also for the Stamptacular Sunday Challenge - "cute as a bug."

We hope you'll play along with us! One lucky participant will be drawn at random to win $10 in YNS Stamp Bucks!! You don't have to use YNS images on your card, but if you do you'll get a double entry in the draw!

Also, the challenge hostess will choose her favorite card, and that winner will get the YNS Challenge "Top Pick" blinkie to proudly display on their blog PLUS $5 in YNS Stamp Bucks! You must use a YNS image to be eligible to be chosen for Top Pick.

Full details can be found at the YNS Challenge Blog. TFL!

Thursday, June 17, 2010

thinking of you

Wow - I have a non-DT card for you today!

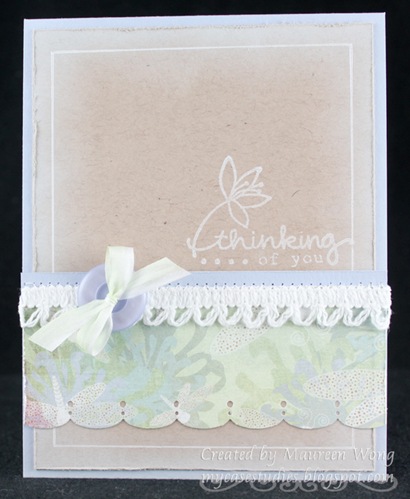
ThinkingofYou
I used a REALLY old Studio G $1 set and a sketch from 2 Sketches 4 You.

Little details: I used a white gel pen and ruler to make the white border all the way around and partially colored the white silk ribbon with my copic to match the light green in the patterned paper (a tip I got from Nichole Heady's blog).

This card is also for Allsorts - Lace and/or Buttons (I'm not sure if my piece of trim counts as lace, but I definitely do have a button on there!) and PaperPlay - Something old that I never used (this stamp is years old and this is the first time it touched ink!). I hope you like it and TFL!

Tuesday, June 15, 2010

La-La's Weekly Wednesday Challenge #43


It's time for another La-La's Weekly Wednesday Challenge! This week I am your hostess and I've chosen the theme of embossing because it's something I normally love to do on cards, but for some reason haven't done lately! Here's what I came up with:

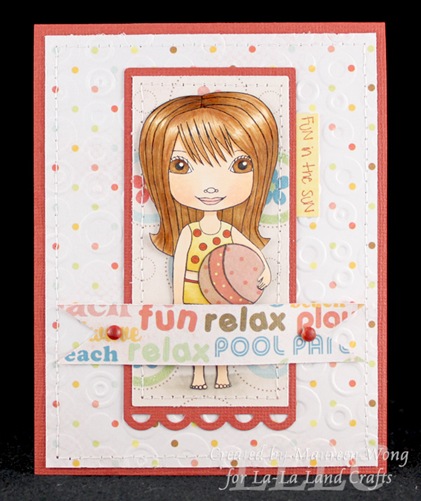
LalaBeach1
I used the new Beach Lala set and a sketch from Taylored Expressions. In case you can't see it, I used a Cuttlebug embossing folder on the polka dot patterned paper. I like that it gives the paper a more whimsical look and some texture!

Lala was colored with Copics, her ball paper pieced, and then the whole thing cut out and popped up on the focal panel. I added the banner with brads airbrushed to match the cardstock and popped up in the middle with foam boosters. Finally I added a sentiment from the Beach Lala set and some straight stitching.

BTW, in case anybody's wondering about the highlights in her eyes, I normally color over the highlights in the image with a black pen and then dot in my own highlight later with a white gel pen. That way I can get the highlights the size I want and placed where I want them.

This card is also for: Before I go, I want to let you know that whatever image the hostess uses on her project is 20% off for the week of the challenge, and this week it's Beach Lala! And since we have a requirement that you must use a La-La Land Crafts image on your projects to win the $10 credit or Top Three, don't forget that we have all these fabulous digi images available!

We'd love to have you play along with us! All the details can be found on the La-La Land Crafts blog. TFL!
Tuesday, June 8, 2010

La-La's Weekly Wednesday Challenge #42

If you're looking for the Your Next Stamp Challenge #18, it's the post directly below this one. Thanks!

* * * * * * * * * *


It's time for another La-La's Weekly Wednesday Challenge! This week our theme was chosen by Lisa and is to make a project with blue as your main color.

Here's my card:

RosieBeach1a
I used the new Beach Rosie set (which includes this sentiment as well as 2 others!) and a sketch from Waltzingmouse Sketch Challenge.

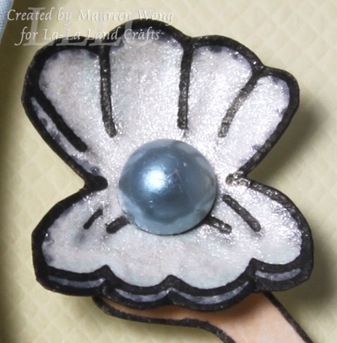
Rosie was stamped, colored with Copics and cut out. Her swimsuit was paper pieced. I also stamped a separate oyster, colored it a little with Copics, painted over with Lumiere paint, then restamped the image over it because the paint made the lines look really faded. Then I cut it out and added a pearl that I airbrushed blue with a Copic marker.

Here's a close shot so you can see the oyster a little better:

RosieBeach1b
Before I go, I want to let you know that whatever image the hostess uses on her project is 20% off for the week of the challenge, and this week it's Garden Rosie! And since we have a new requirement that you must use a La-La Land Crafts image on your projects to win the $10 credit or Top Three, don't forget that we have all these fabulous digi images available now!

We'd love to have you play along with us! All the details can be found on the La-La Land Crafts blog. TFL!
Your Next Stamp Challenge #18

Your Next Stamp Challenge

Yay! I have another Your Next Stamp Challenge today! This time our theme was chosen by Simonne and is to use buttons on your project.

Here's what I came up with:

BigTallGrass2a
I used the new Big Tall Grass set, a sentiment from Elegant Greetings and a sketch from Mojo Monday. This card took FOREVER, but I'm really happy with how it turned out!

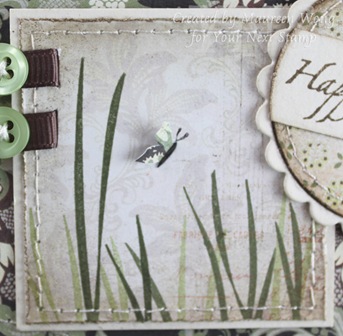
I used 2 different color markers and my stamp positioner to get the grass exactly how I wanted it on the light patterned paper. Then I stamped the 2 side facing butterflies on the back of the black floral paper and cut them out, leaving off the antennae. I took a fine black pen and colored the bodies black. Next I cleaned off both stamps, then inked up just the bodies and antennae and stamped one on the grass panel and the other next to the sentiment. I glued both butterflies over their respective bodies and bent the wings up for dimension.

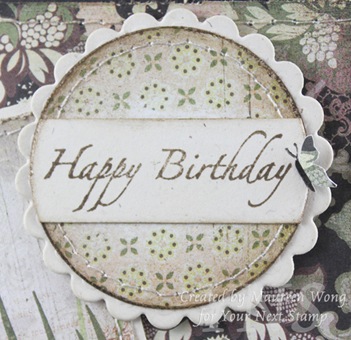
Here's a closer look at the sentiment piece:

BigTallGrass2b
And the grass piece:

BigTallGrass2c

Finishing touches - I cut small slits to put the grosgrain ribbon through and tied them off with buttons and embroidery thread, stitched around all the pieces and distressed/inked most of the edges, and punched the bottom edge with a Fiskars border punch.

This card is also for the Pixie Dust Studio Challenge - "Punch it out."

We hope you'll play along with us! One lucky participant will be drawn at random to win $10 in YNS Stamp Bucks!! You don't have to use YNS images on your card, but if you do you'll get a double entry in the draw!

Also, the challenge hostess will choose her favorite card, and that winner will get the YNS Challenge "Top Pick" blinkie to proudly display on their blog PLUS $5 in YNS Stamp Bucks! You must use a YNS image to be eligible to be chosen for Top Pick.

Full details can be found at the YNS Challenge Blog. TFL!

YNS June New Release Blog Hop

Hello everybody! Thanks for joining us for another fun and fabulous Your Next Stamp Blog Hop! Besides the Fhiona Singles and Elegance Series, YNS also just released a whole bunch of other stamps so the Starlets (and our awesome guest designers!) have whipped up some eye candy using many of the new images. (You can see all of the June releases here.)

And if that's not enough yet, we also have Mystery Stamp Packages in the store! How fun!

If you came here by way of Jen's blog, then you're on the right track! If not, please go back and start at Cabio's blog because you won't want to miss a stop! There is a prize up for grabs of $50 of new release stamps (winner's choice)!! The winner will be randomly drawn from one of the Starlet's blog hop comments, but you won't know which one so make sure to comment at every stop! This hop will run until Sunday, June 13 at midnight EST.

*****And now on to the show!*****

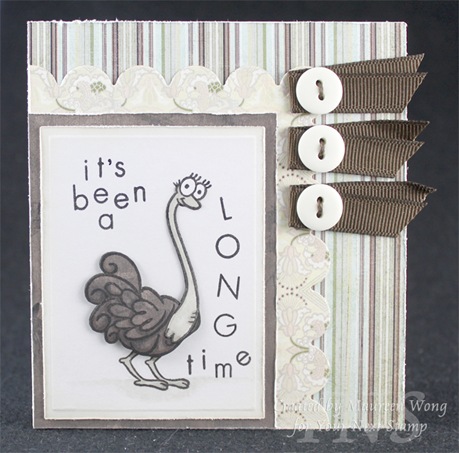
For my first card, I used the adorable Isabella the Ostrich:

IsabellaOstrich1
First off, I just want to say that I'm not normally a fan of ostriches, but this one was just too cute to resist! I stamped her 3 times - twice on white cardstock, and once on the dark brown patterned paper. One cardstock version is the base and I just colored her legs and the ground. With the second cardstock version, I colored and cut out her head and neck (I didn't bother with the eyelashes since they were on the base version). I cut out the body and part of the neck from the PP version and glued the cardstock head and neck to it. Then I stuck the whole thing to the base, gluing the head down flat, but using a foam booster under the body for dimension.

The sentiment is my own creation using a Close To My Heart alphabet set and the sketch is from Just Us Girls.

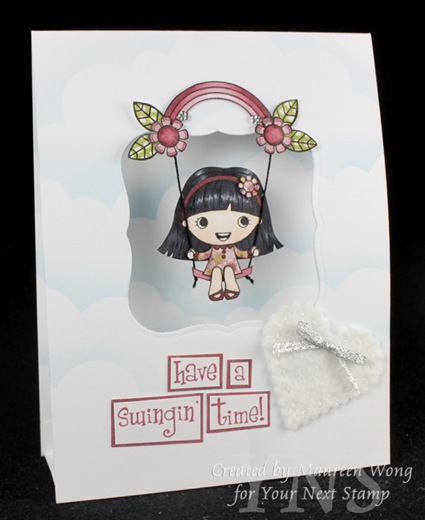
For my second card I got to use the super cute Rainbow Swing Fhiona set:

RainbowSwingFhiona1
I made a tent card which is perfect for Fhiona to swing in! I paper pieced Fhiona's dress and the flower on her headband, as well as the flowers and leaves on the rainbow. The rest was colored with Copics and I sponged the clouds with a homemade cloud template. To get Fhiona swinging, I used 2 pieces of crochet thread glued to the back of the swing seat (I even knotted the ends just to look more like a rope swing), then glued right over the rope lines of the image, and then taped inside the card.

The finishing touches are a sentiment from the set all cut up into individual words, and a die cut felt heart with white embroidery thread stitching and a little silver bow. It's so fun to watch her swinging in the breeze made by our ceiling fan!

I tried to use Jen's Sketch for you to try, but then I couldn't figure out how to make all the elements fit over the sky background, so I left out a couple parts!

I hope you liked my projects and thanks for hopping along with us! Your next stop is the incredibly talented Amy.

Monday, June 7, 2010

Happy Birthday Jane!

Today is the birthday of one of my fellow La-La Land Crafts DT members - Jane! You can head on over to the La-La Land Crafts blog to see more fabulous cards celebrating Jane's day and then pop over to her blog and leave her some love! Here's my card:

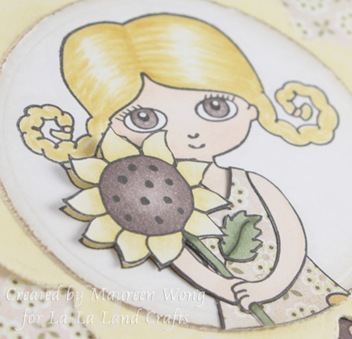
RosieSunflower1a
I used Sunflower Rosie and a sketch from Sketch Saturday. Everything besides the dress was colored with Copics. I paper pieced Rosie's dress and added an extra flower with attached arms over the dress for realism, popping up just the flower head for dimension. The sentiment is from Papertrey Ink.

Here's a close shot so you can see the dimension and the paper piecing:

RosieSunflower1b
This card is also for Charisma Cardz (flowers) and Daring Cardmakers ("A String of Pearls").

I hope you like and TFL!

Friday, June 4, 2010

YNS June Releases - Day 2


Hi everybody! Thanks for joining me for Day 2 of our Your Next Stamp June releases! Today we have a very special new collection of stamps called the Elegance Series! And they really are elegant and so much fun to play with!

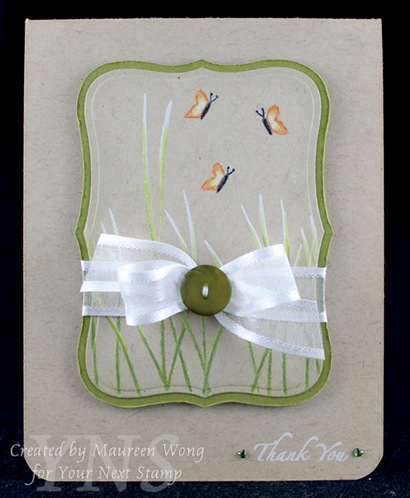
I was thrilled to use the Big Tall Grass set:

BigTallGrass1
I stamped the grass and butterflies with white ink on Kraft cardstock and let dry thoroughly. Then I colored with colored pencils, leaving some of the white showing through. Then I embellished and finished off with a sentiment from the new Elegant Greetings set.

I've got more ideas for this set, so watch this space! =)

Before I go, I want to remind you that there's a great sale going on right now: you can get 15% off your entire order - just use the code YNSJUNE2010.

Please come back on June 8 for our Blog Hop where you get to see the rest of our fabulous June releases!!

Tuesday, June 1, 2010

La-La Land Crafts Summer Release Blog Hop!

If you're looking for the Your Next Stamp June Releases - Day 1, it's the post directly below this one. Thanks!

* * * * * * * * * *


Summer has arrived in La-La Land with a bang, and we have 9 wonderful new stamp sets (including fun sentiments) for you all in our wonderful deeply etched rubber. If you came here from 1LuvnMama's blog, then you're on the right track. If you've just happened upon the blog hop, please start over at Irina's blog so you don't miss any of the yummy eye candy we've all created for you!

You can play along with us and make a fun summer themed card to enter our weekly Wednesday challenge – just be sure to link your project to Mr. Linky on the La-La Land Blog by Monday, June 7th, 2010 at 11:59pm PDT (GMT-8). Be sure to link directly to the blog or gallery post featuring your entry!

After you've visited all the Design Team Blogs, why not head to the La-La Land Crafts store to pick out your fabulous new summer stamps, and have fun!!

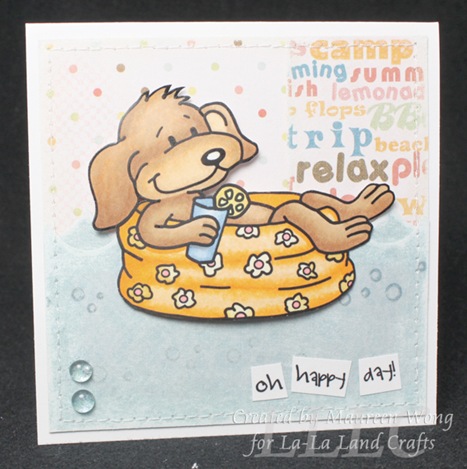
I got to play with the super cute Summer Lucky set:


And here's my card:

HappyGoLucky1
Lucky was colored with Copics, cut out and popped up on foam boosters. I know he's technically in a little wading pool, but I took some creative license and pretended that he's in an inner tube floating in the ocean! You can just see a little of the waves behind him and that little bit of text paper is showing all the fun summer thoughts running through his head!

The sketch is from Friday Sketchers and the papers are Imaginisce.TFL and I hope you like my card!

Your next stop is the super talented Jana!

YNS June Releases - Day 1


Hi everybody! I've got a special treat for you today - it's the first of a bunch of new releases from Your Next Stamp! Today we are showcasing the new Fhiona Singles! These aren't new images, but now 10 of the Fhionas can be bought singly instead of in the full sets! You can see all the Starlets' creations on Karen's blog! The full sets will be retiring as they sell out, so if any of these were on your wish list, get them now while they're still available and on sale!

Something else new at YNS - cling mount add on options! Now you can either get just plain rubber or purchase an add on to have your stamps already mounted on cling when you buy them - how convenient!! I mount all my unmounted stamps on cling so this is a great option for me!

One last bit of news before I get to my card: we are having a June New Release sale!! You can get 15% off your entire order - just use the code YNSJUNE2010.

And now on to my card for today:

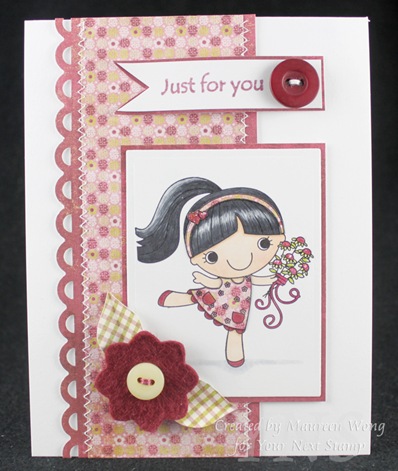
FhionaFlowerBouquet1
I used Flower Bouquet Fhiona and a sketch from Card Patterns (you can see I took some liberties with the sketch!)

Fhiona was stamped and her hair and skin were colored with Copics. I paper pieced her headband and dress and colored the pockets and trim of her dress, the hearts on the headband, her shoes and the flower bouquet with colored pencils. I used the pencils because the bouquet has such little details that it was just easier to use really sharp pencils rather than Copics. You can't tell the difference so don't be afraid to mix your coloring mediums!

For the finishing touches, I stamped a sentiment from the Mini Greetings set (which is the perfect complement for all these Fhiona Singles), cut it into a flag with a bit of matting and sewed on a button. Then I die cut a flower out of felt, sewed on a button and added a couple of hand cut leaves. I normally buy the really cheapo felt from the craft store, but recently got some better quality stuff from Etsy to make feltie dolls and the difference is amazing! I could never get a really nice die cut with felt before, but this flower came out perfectly! Definitely worth the extra cost!

We've still got more new releases in store for you, so please stop back for our next release on Saturday, June 5 (although my post should go live late Friday night Hawaii time). And then we'll be having a blog hop on Tuesday, June 8 (late Monday Hawaii time) where they will be an awesome prize to be won!! TFL and hope to see you back soon!