Saturday, December 25, 2010

Christmas Picture Line

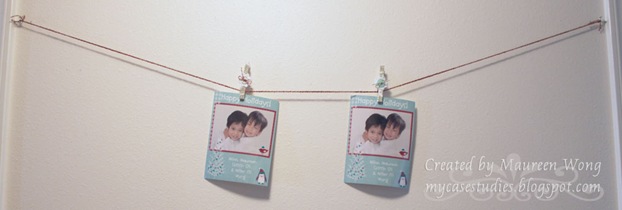
Ok, here's my final holiday Timeless Twine project of 2010! I made a line with decorated clothespins to hold all of the pictures we get during the holiday season (out of respect for our friends' privacy, I only have our picture up):

ChristmasLine1
I simply cut 3 looooong lengths of Berry and Olive Timeless Twine and braided them together, knotting at the ends. Hubby then put in 2 screw-in cup hooks to hold it up.

Here's a closer shot:
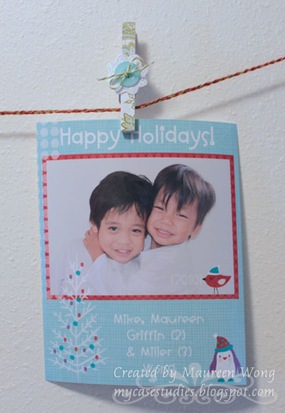
ChristmasLine2
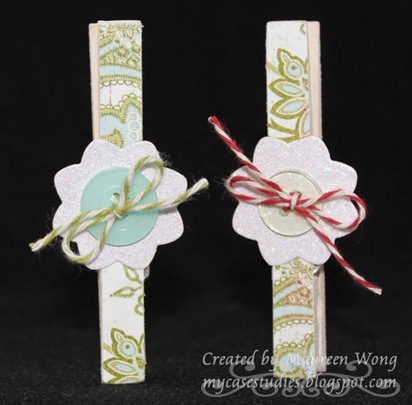
For the clothespins, I dipped them in a wash of water and white acrylic paint and let dry. Then I glued strips of patterned paper and sanded down the strips to make them fit exactly. I cut Nesties shapes from Doodlebug Sugar Coated cardstock, and tied buttons on with Olive Green or Holly Berry Red Timeless Twine. Here's a close shot of the clothespins:
ChristmasLine3

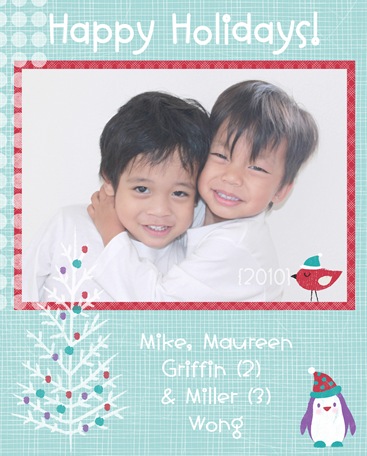
Finally, here's a better shot of our card:
ChristmasCard2010 Redone
Hubby took the picture (I think he did an awesome job - looks totally professional!) and I made the card in Photoshop using the free Snowy Holiday kit from Nancy Kubo that was given out during Little Dreamer Designs' 25 Days of Christmas event - a huge thanks to Nancy and Little Dreamer Designs!

To all of you: thank you so much for visiting my blog and leaving all your wonderful comments - they're like little presents every time! I hope you all have a very Merry Christmas!!

Friday, December 24, 2010

Christmas Laulau

While hubby and I were making laulau for our family Christmas lunch tomorrow, I decided to try something fun:


Instead of using plain old white cotton string, I tied this one off with some Holly Berry Red Timeless Twine! Isn't it cute and festive?!

This one is definitely the envy of all its friends!


If you stop by tomorrow, I'll have another holiday Timeless Twine project to share! TFL!

Thursday, December 23, 2010

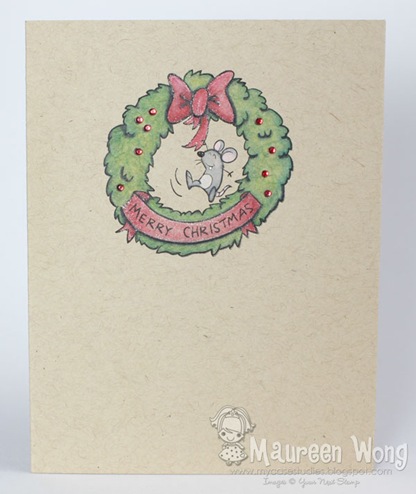
CAS Merry Mouse Wreath

Today is my day to post on the YNS Paper Craft Planet group and here's what I came up with:

MerryMouseWreath1
I know a lot of us are really busy so I decided to go with a super Clean & Simple card today. It's a one layer card with almost no embellishing - doesn't get much more CAS than that!

I used the adorable Merry Mouse Wreath (I just love this little mouse!), stamped on Kraft cardstock and colored entirely with colored pencils. I then added some old tiny rhinestones colored with a red Copic marker and a little bit of Stardust glitter pen and that's it!

This is also for the following challenges: I hope you like it and that you'll come by the PCP group to see what other eye candy has been posted by the DT! TFL!

Tuesday, December 14, 2010

Your Next Stamp Challenge #32

Your Next Stamp Challenge

Yay! I have another Your Next Stamp Challenge today! I know the timing is a little weird since it's only been 1 week since the last challenge, but we're switching things up just a bit for the end of the year! Since we know what a busy time this is, this will be our final challenge for 2010 and will last 3 weeks.

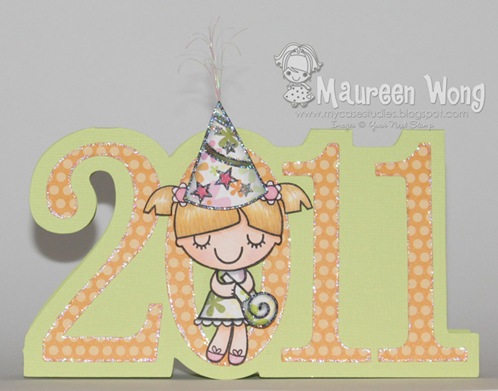
Our theme was chosen by Karen and is "Let's Party!" We'd like to see party invites, party decorations, food decorations, party bags, New Year's cards, dressy creations - anything that screams "PAR-TAY!" I decided to go with a New Year's card (or it could be a table decoration):

FairyFhiona3a
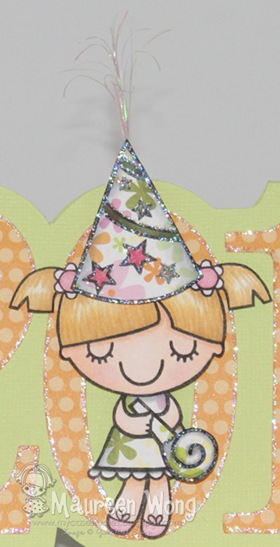
I used Fairy Fhiona and the Let's Party set. I stamped Fhiona, colored her with Copics and cut her out, leaving off the wings. I paper pieced her dress, the hat and noisemaker, did some shading with Copics and lots of glittering with Stickles. I cut apart her hands so she could hold the noisemaker and I stuck the hat on her head with foam tape. If you look closely at the top of the hat, you can see I added some pieces of iridescent tinsel that I curled with my fingernail:

FairyFhiona3b
I created the card base in Make the Cut and cut it out with my Cricut. Before gluing down the numbers, I Stickled all the edges. Finally I added Fhiona with foam tape.

We hope you'll play along with us! One lucky participant will be drawn at random to win $10 in YNS Stamp Bucks!! You don't have to use YNS images on your card, but if you do you'll get a double entry in the draw!

Also, the challenge hostess will choose her favorite card, and that winner will get the YNS Challenge "Top Pick" blinkie to proudly display on their blog PLUS $5 in YNS Stamp Bucks! You must use a YNS image to be eligible to be chosen for Top Pick.

Full details can be found at the YNS Challenge Blog. TFL!

Tuesday, December 7, 2010

Your Next Stamp Challenge #31

Your Next Stamp Challenge

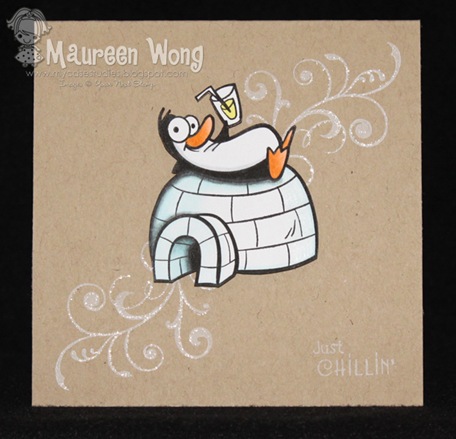
Yay! I have another Your Next Stamp Challenge today! This time our challenge was chosen by Jenny and is to create a clean and simple Christmas card. I just realized that I goofed a bit and didn't actually make a true Christmas card, but here it is anyway - sorry for my mistake!

PenguinCheers1
I used the really cute and fun Penguin Cheers stamp and a sketch from Card Positioning Systems.

I stamped the image on white cardstock, colored with Copics and colored pencils with odorless mineral spirits, then cut the image out and popped it up on foam boosters. The swirl and sentiment are from There She Goes. I went over the swirls with a Stardust glitter pen and that's it!

We hope you'll play along with us! One lucky participant will be drawn at random to win $10 in YNS Stamp Bucks!! You don't have to use YNS images on your card, but if you do you'll get a double entry in the draw!

Also, the challenge hostess will choose her favorite card, and that winner will get the YNS Challenge "Top Pick" blinkie to proudly display on their blog PLUS $5 in YNS Stamp Bucks! You must use a YNS image to be eligible to be chosen for Top Pick.

Full details can be found at the YNS Challenge Blog. TFL!

Saturday, December 4, 2010

Christmas Gifties!

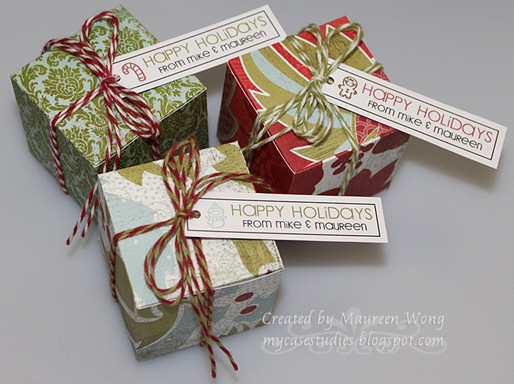
Today's project doesn't have any stamping on it - a real rarity for me! I needed some fast and fun little gifties so I created a tiny square box using Make the Cut (love this program!). I started out making the boxes 2" square, but then shrunk them down just a little so I could actually cut 2 boxes out of a sheet of 8.5x11 cardstock. I ended up using patterned paper though so they fit easily, but I still kept them the smaller size. Here they are:

Holiday2010Boxes
I cut them out using my Cricut, glued them together and added lots of yummy Timeless Twine and these tags I created in Photoshop (you can enlarge to see the tags better).

You can see that I used all 3 new colors of twine: Holly Berry Red, Olive Green, and the Holly Berry and Olive combo (or you can find a pack of all three HERE). I was really happy when I saw that the twine matches these Basic Grey Christmas papers so well!

I am loving playing with this fabu twine that Stacy sent me (these rolls are HUGE - I think they may just last me forever!), so keep watching this space for more twine creations!

And in case you're wondering, for my tags I used the LD Woodland font for the words, DB Holidays for the gingerbread man, and DB Charlie Calendar for the candy cane and snowman (I also did a couple other designs that aren't shown here - these DoodleBat fonts are loaded with great little designs!).

I'm entering these in the following challenges: I hope you like them and TFL!

Thursday, December 2, 2010

Penguin Buds

Today is my day to post on the YNS Paper Craft Planet group and here's what I came up with:

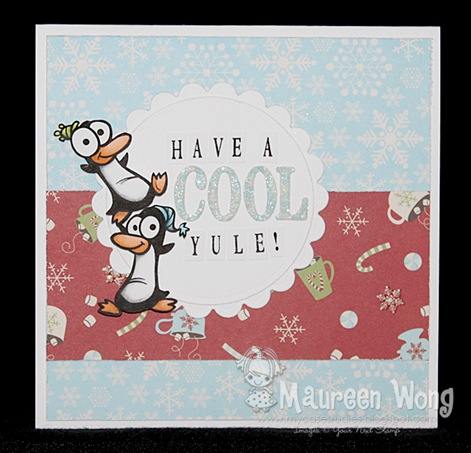
PenguinBuds1
I used the super cute Penguin Buds stamp and FTL#118 from Clean & Simple Stamping.

The buds were colored with Copics and colored pencils, cut out and popped up on foam boosters. For the sentiment, I diecut the COOL letters out of the same snowflake paper as the background and covered them with glitter. The rest of the letters were stamped with a JustRite alpha set and cut out freehand.

This card is also for Top Tip Tuesday - Anything goes. I hope you like it and that you'll come by the PCP group to see what other eye candy has been posted by the DT! TFL!