Showing posts with label My Favorite Things. Show all posts

Monday, April 29, 2019

Birthday Basics Turnabout Cards

Hi all!  I actually have 3 cards for you today!  The reason is because I also have a little tip for you: when you use your turnabout stamps and dies from Concord & 9th, make at least a few at the same time to save time!  Since you already went through the trouble of setting up the turnabout stamp in your MISTI (or other stamp positioning tool) and picked out your coordinating colors of ink, why not stamp a bunch of card fronts to have ready to go later when you need a last minute card and are strapped for time?  Birthday cards are especially handy to have around, so here are a few ideas for you.


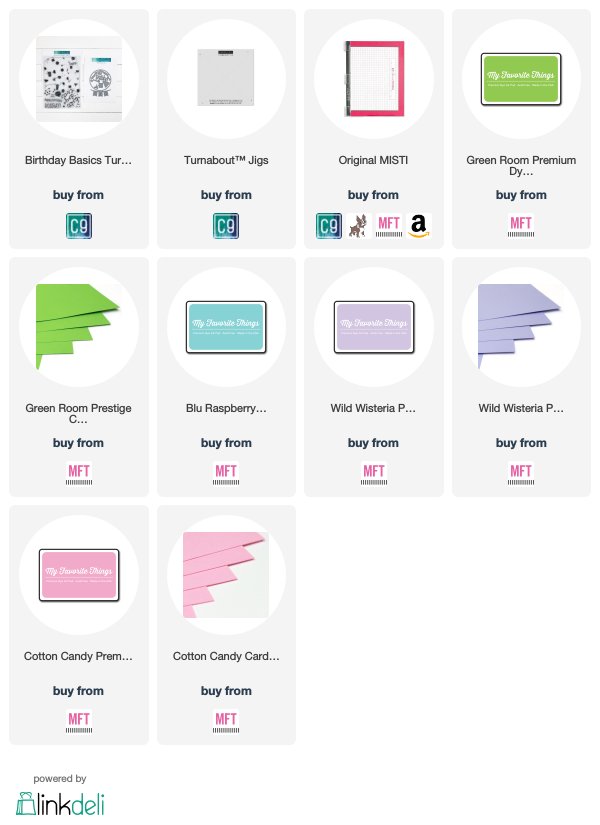
As I said, I set up my Birthday Basics turnabout stamp in my original MISTI and picked out 4 colors of ink from My Favorite Things that I love together.  I also got out a sheet of kraft cardstock and white cardstock and cut them in quarters, making a total of 8 A2 size cardfronts.  I also needed a few extra turnabout jigs for this so I picked up a couple extra from Concord & 9th, but you could also make your own out of cardstock (like we used to do in the pre-jig days).

I put the jig with card front in the first position and stamped with the pink ink.  Then I switched out the jig to another with a blank card front and put it in the first position and stamped with the pink ink.  I went ahead and stamped all the fronts with the pink ink and then cleaned off the stamp.  It saves a lot of time not having to clean the stamp every single time you stamp!

Then I put the jig in position 2 and stamped with the green ink.  And continued with all the fronts.  Then I did the blue and purple inks.  When I was done, I had 8 card fronts on 2 different colors of cardstock!


To make the shaker card, I took one of the kraft panels and die cut an opening with a Lawn Fawn die.  I got a white cardstock base and stamped with the word and confetti images from the Birthday Basics set with the same ink colors.  I added 2 layers of craft foam with a circle cut out of them, and filled the opening with the Enchanting sequin mix from Little Things from Lucy's Cards - it's the perfect match for my colors!  Finally I sealed off the opening with some Duralar film and it was done!

My second and third cards are a twofer - I made one with bits left over from the other!


I used the dies in the matching die set and also the Altenew Bold Alphabet die set for the HAPPY letters.

And I still have 6 card fronts left to make into cards!!  Such a great way to save time making multiple cards (and they don't all have to be the same design).

Thanks very much for stopping by my blog and hope you have a great day! ~Maureen

*Affiliate links don't cost you any extra, but help me out.  Thank you!
Tuesday, January 19, 2016

You're A Real Gem

Hi all! Today I have a card that uses powdered watercolors, specifically Brushos, but you can definitely use Color Bursts instead. I was playing one day when I came up with a result that looked kind of mottled and really cool so I kept playing until I figured out how to recreate it. Here's the card I made using the technique:


And here's a closer look at the effect:


I did a video so you could see how I did it:


And here's THE LINK to the video in case you can't see the video player above.

And here are some other results that I got:


The first shows the perfect effect with the water, but a little too much powder, making it very dark.  Still a nice effect though.  The second sample needed a little more water, especially on the left side.


On the first sample, I used a little too much water so it blended more than I liked, but it's still nice.  On the second sample, I dampened the watercolor paper first so that the powder would stick better, but it ended up blending way more than I wanted.  I wouldn't do this in the future.  The powder on dry paper definitely gives better mottled results.

This is also for the MFT Color Challenge.  I hope you like it and TFL!


Sunday, November 8, 2015

Too Much Happy

Hi all!  As usual, I have a card for several challenges:

ScribbleRoses1

I used LJD Scribble Roses,  Scribble Roses Overlay Die-Namics, and a sentiment sticker from Small Talk. 

I got a scrap of watercolor paper, sprayed it with water and added some Distress Inks to it.  I cut it out with the Scribble Roses die.  I cut the Overlay out of toner cardstock that I printed and foiled it with gold foil.  Finally I watercolored another scrap of watercolor paper with green Distress Inks and stamped and embossed the leaves in gold.

The stitched rectangle and circle are from Blueprints sets and the sequins are from Lucy’s Cards.

This is for the following challenges:

I hope you like it and TFL!

Sunday, October 25, 2015

I Dare You

Hi all!  Today I have a card for The Greeting Farm’s challenge – black, orange, and purple:

GlitterBean1a

The picture looks a tad funny because this is actually a clear card!  Here’s a shot of the front of the card when it’s open:

GlitterBean1b

I used the (retired) Glitter Bean from TGF.  She was stamped with Versafine Onyx Black ink 2 times (using the MISTI) on watercolor paper and embossed with Detailed Clear embossing powder.  I then watercolored her with Zig Clean Color Real Brush markers and a waterbrush.  I cut out the main panel with the Stitched Rectangle Die Set, stuck it to the front of the clear card, and stuck a mat piece of black cardstock to the inside front of the card. 

Here’s how I finished off the inside:

GlitterBean1c

I created the plaid background with the Candy Stripes Background Builder and some MFT dye inks and the MISTI.  I added a white panel the same size as the front panel and a black mat over the plaid to write a message.

This is also for ABC Challenge – T is for Two (I used 2 colors besides black and white) and Cute Card Thursday – Anything Goes.  I hope you like it and TFL!

Sunday, October 18, 2015

Like No One Elf

Hi all!  Today I have a card for CAS(E) this Sketch:

SantasElves1

I stamped the elf from Santa's Elves with Memento ink using my MISTI and colored with Copics.  Then I overstamped with Versafine Ink to make the black lines darker and crisper.  I cut him out using my Scan N Cut 2.

Using the MISTI, I stamped the 2 different sentiments repeatedly on the card base and then mounted the elf on top with foam tape.  I hope you like it and TFL!

Friday, September 18, 2015

Just Fur You

Hi all!  This is my 5th and final entry into the MFT Card Design Superstar Contest:

IKneadYou1a

I used I Knead You (Birdie Brown) from MFT and the Plaid Patterns Paper Pack.

I used the Scan N Cut to cut the box base using an SVG file from SVG Cuts.  I also cut the patterned paper panels with the SNC.  Next I stamped all the images in Versafine ink and clear embossed, then watercolored with Clean Color Real Brush Markers.  I cut them all out and placed them all over the card, mostly with foam tape.  The cat in the back is actually only attached to the Hemp Cord so it moves with the cord. 

Here are the sides of the box:

IKneadYou1bIKneadYou1c

IKneadYou1d

And here’s a view from the top so you can see the decorated flaps:

IKneadYou1e

And yes, it does really fold flat for mailing, just like a good box card should!  I hope you like it and TFL!

Thursday, September 17, 2015

From My Barn To Yours

Hi all!  I’m here with my 4th entry into the MFT Card Design Superstar contest.  It’s a surprise easel card (that’s what I called it when I first made THIS ONE 5 years ago).  Here it is closed flat:

WholeHerd1a

You can see the barn doors open to reveal the piggy inside.  And then when you open up the barn easel portion, there’s a surprise flap of grass to hold the easel in place:

WholeHerd1b

The great thing about just making the barn an easel is that the card inside is completely hidden so you can write any kind of message you want and your recipient doesn’t have to worry about it showing when she displays your card. 

Here’s a higher shot so you can see the sentiment, which was hidden by the barn in the closed position:

WholeHerd1c

I used a bunch of MFT product for this card:

This is also for SSS Wednesday Challenge – use at least one die cut and Little Red Wagon – Try something new (this is my first time using the Barn Die-namics).

I made a video:

And here’s THE LINK in case you can’t see the video player above.  I hope you like it and TFL!

Wednesday, September 16, 2015

Overflowing Joy

Hi all!  Today I have a card for a few challenges:

OverflowingJoy1

This is a one-layer card (meaning that I did everything directly on the card base with no additional layers)!  To make the colored strips, I die cut the washi tape die from Blueprints 13 from acetate to make a stencil.  I then sponged 3 colors of Distress Ink through the stencil at different angles.  I stamped a sentiment from PI Overflowing Joy and added some black Darice sequins.

This is for the following challenges:

I hope you like it and TFL!

Monday, September 14, 2015

Cultivate Kindness

Hi all!  Today I have a card for a few challenges:

LayeredLeaves1

No stamps were harmed in the making of this card!  I used a die from MFT (Layered Leaves) and a sticker from the Tim Holtz Small Talk booklet.  I simply did the inlay technique with the leaf and added the sticker over top – super easy!

This is for the following challenges:

I hope you like it and TFL!

Saturday, September 12, 2015

Aloha

Hi all!  I’m here with my second entry into the MFT Card Design Superstar Contest:

PolynesianParadise2

I used Birdie Brown’s Polynesian Paradise – almost the entire set!  I stamped the girl with white ink on black pastel paper (the smooth side) and colored her with Luminance pencils.  For the background, I stamped all of the image stamps from the set (except the hula girl) in yellow ink on matching yellow cardstock to make my own “patterned paper.”  Finally, I stamped the sentiment in black ink.  The panel was cut with a die from Blueprints 13.  I hope you like it and TFL!

Wednesday, September 9, 2015

Mon Cheri

Hi all!  Today I have a card made for the MFT Card Design Superstar Contest:

MonCheri1

It’s a shadow box card using the new Birdie Brown Mon Cheri stamp set (colored with Copics).  I also used the Boutique Window Die-Namics, the English Brick Wall stencil, and the Petal Pattern stencil (used on the inside as “wallpaper”).

Here’s a bottom view so you can see this really is a box:

MonCheri1b

But it folds flat for mailing and fits inside an envelope meant for a 5x7 card.

This is also for SSS Monday Challenge – Stamp and Punch/Die Cut and SSS Wednesday Challenge – Use a Stamp.  Hope you like it and TFL!

Tuesday, August 25, 2015

Mahalo

Hi all!  I live in Hawaii, so to me it was a given that I would have to have Birdie Brown’s Polynesian Paradise.  Here’s my first card made with this adorable set:

PolynesianParadise1

I am absolutely LOVING on this little guy!  I’ve been playing with him for days and finally managed to get him on a card!

I stamped him in Memento Tuxedo Black ink and colored just the body with Copics.  Then I overstamped (using my MISTI) with Versafine Onyx Black ink.  I stamped him again on MFT plaid paper with Onyx Black and cut out just the shell.  I shaped the shell and attached it with a foam dot.

I stamped the sentiment (also from the set) using my MISTI and Onyx Black ink (had to stamp it twice to get it perfect) and then mounted the little guy over the sentiment with thin foam tape.

This is for CAS-ology – Plaid and MarkerPop – Anything Goes (colored with markers).  I hope you like it and TFL!

Wednesday, July 15, 2015

You’re Amazing

Hi all!  Today I have 2 cards made using the Color Bursts again.  Can you tell I’m sort of addicted to playing with these right now?

FrigginFabulous1

FrigginFabulous2


I used the sketch from CAS(E) This Sketch and the red, orange, and yellow Color Bursts.  The butterflies are from the Flutter of Butterflies – Lace die set and were cut from label (sticker) paper.  The sentiment is from Friggin Fabulous from The Ton Stamps.  And I made a video:

This is also for SSS Monday Challenge – Anything Goes.  I hope you like it and TFL!

Monday, July 13, 2015

It’s a Good Day

Hi all!  Today I have a card made for the MFT Sketch Challenge #236:

SunflowerSweetheart2

I used the Flutter of Butterflies – Solid and the Flutter of Butterflies – Lace.  I sponged 3 Distress Inks on the solid version and topped it with the lace version in black, which had gold embossed edges.  I cut all the pieces with various Blueprints dies and spattered a little gold Memories Mist over the card.  Finally I added a sentiment from Sunflower Sweetheart.

I hope you like it and TFL!

Saturday, April 4, 2015

Surprise Birthday Window Card

Hi all!  Today I have a card made for the MFT Sketch Challenge.  Here’s the outside view:

SweetBirthdayWishes3a

And here’s the inside:

SweetBirthdayWishes3b

I used a bunch of MFT products: Sweet Birthday Wishes stamp set and matching dies, Blueprints 12, Blueprints 13, Tickled Pink cardstock, Wild Wisteria cardstock, and Brown Paper Bag cardstock.

I colored with Spectrum Noir colored pencils:

  • skin – 100, 89, 8, 7, 4, 1
  • pink – 33, 34
  • turquoise – 53, 54
  • purple – 76, 77
  • yellow – 84
  • black - 120

I used my MISTI to help me stamp everything, especially getting the girl positioned just right in the window.

I also made a video:

And here’s THE LINK in case you can’t see the video player.

Other items used in the video:

This is also for the following challenges:

I hope you like it and TFL!

Monday, March 30, 2015

Somebunny Birthday

Hi all!  Today I have a card for a couple of challenges:

Somebunny3

I used the Somebunny set and the sketch from Freshly Made Sketches.  The bunny was stamped in kraft ink and colored with Spectrum Noir pencils.  The stitched banner is from a Blueprints set and the sentiment was stamped with Hot Fudge ink.

This is also for the MFT Color Challenge – Daffodil, Brown Paper Bag, Tangy Orange, and Berrylicious and SSS Wednesday Challenge – Anything Goes.  I hope you like it and TFL!

Thursday, March 19, 2015

Pawsitively Awesome

Hi all!  Today I have a card made for the current MFT Color Challenge:

Color 17

And here’s what I came up with:

YouHaveMyHeart1

I finally got the You Have My Heart set from MFT and had to ink it up right away!  I also had to play with the striped inlay technique that I’ve been seeing everywhere, so I cut up strips of Steel Blue, Coral Crush, and Tropical Teal cardstock and did the inlay technique with the Friend Die-Namics.

I used my MISTI to line up the sentiment from the set over the diecutting and also the image in the corner and stamped them with Steel Blue ink.  I colored the image with Spectrum Noir pencils and the card base is Rustic White from PTI.

This is also for Less is More – One Layer Card (and add an animal).  I hope you like it and TFL!

Saturday, February 21, 2015

More Somebunny

Hi all!  I just can’t get enough of this adorable set!!  This card is for the MFT Sketch Challenge:

Somebunny2

I stamped a bunny from Somebunny in MFT Kraft ink, using my MISTI to get it perfectly lined up.  Then I colored it with Spectrum Noir pencils.  The hill was cut with a Mama Elephant die and I used the MISTI again to stamp the sentiment.  Finally, I added 2 little dotted clouds that are also in the set.

I hope you like it and TFL!

Tuesday, February 17, 2015

Somebunny

Hi all!  Today I have a card for a few challenges:

Somebunny1

I used the Somebunny stamp set and matching dies and of course, my MISTI to get that sentiment perfect.  I also used the Dizzy Doily as a mask for the white spray.

This is for the following challenges:

I hope you like it and TFL!

Sunday, February 15, 2015

Sprinkled with Fun

Hi all!  Today I have a card for a couple of challenges:

Donuts&Sprinkles1

I used the new Donuts and Sprinkles stamp set and matching dies.  The sketch is from the MFT Sketch Challenge and this is also for Curtain Call – Donut Delight.  I hope you like it and TFL!