Monday, August 29, 2011

Fall Birgitta

I have another watercolored card for you today because I just cannot stop playing with my Tombows! :)

FallBirgitta1
I used the digi Fall Birgitta and a sketch from Cute Card Thursday.

The buttons are from Papertrey and the sentiment is from Stampin' Up!

Tombows used:
Hair: 969, 977
Face: 942, 772
Dress: 526, 177, 98
Flowers: 977, 55, 25
Grass: 177, 98
Fence: 977, 969
Shadow around Birgitta: 992

This card is also for the following challenges: I hope you like it and TFL!

Sunday, August 28, 2011

Fancy Phrases

I have a card today for a few challenges:

FancyPhrases1
I used Fancy Phrases from Waltzingmouse Stamps and sketches from Waltzingmouse (the tag portion) and Unscripted (the background portion).

The papers are from the Echo Park Victoria Gardens 6x6 paper pad and the felt rose was made using the smaller of the Mini Rolled Roses dies.

This card is also for Pixie Dust Studio - add a tag or create a tag, and Creative Card Crew - handmade flowers. I hope you like it and TFL!

Saturday, August 27, 2011

Cupcake Leslie 2

I have another watercolored digi for you today for the Karber Challenge - use your fave embellishment (currently a tie between twill and twine) and a Karber image and the KB Challenge - use twine:

CupcakeLeslie2
I used Cupcake Leslie and a sketch from Sketchy Thursday.

Tombow colors used (in case anybody wants to know, I'll try to keep track): N25, 942, 800, 772, 757, 373

The papers are from the Happy Go Lucky 6x6 paper pad from My Mind's Eye, the twine is from Timeless Twine and the rub-on is from Stampin' Up!

This card is also for: I hope you like it and TFL!

Friday, August 26, 2011

Balloon Kaylee

Before I get started with today's post, I thought I'd mention something. You may have noticed a couple of watercolored projects recently and I said I used Tombow markers. Well, I just have to tell you that I got the full set as an early birthday present from my hubby!! :) He got them from Amazon and I really don't think you can beat that price! I'm having a ball playing with them so you should be seeing a lot more watercolored images from me!

Also, I got a new printer and even though it's an inkjet, the ink is water resistant! It's an Epson Workforce 840 and works with watercolors, Copics and colored pencils with OMS!! All this awesome new stuff has definitely helped to bring my mojo back!

Anyway, on to today's card:

BalloonKaylee1
I used Balloon Kaylee, a sketch from Mojo Monday, and the Shabby Backgrounds digi papers from Iralamija.

I watercolored Kaylee with my Tombows and paper pieced the balloons. The die cut behind Kaylee is from My Favorite Things and I finished it all off with some twill tape (tea-dyed), pink Timeless Twine (also tea-dyed), a little silk flower that I glittered and a button from my stash.

This card is also for the following challenges: I hope you like it and TFL!

Thursday, August 25, 2011

3 Chocolate Challenge Part 2

As you can see from the title, this is the second part of my personal 3 Dove chocolate challenge. (Here's Part 1.)

I made this for the Simply Betty Challenge - make a Halloween treat container:


I already had a bag template that I designed in Make the Cut from this project, so I just made it really tall and skinny to perfectly fit the 3 chocolates. I sized down digi Betty so she would also fit on the little bag and printed her on both sides after it was cut out. The final touches are some die cut grass and Halloween Timeless Twine.

This is also for Dutch Dare - Anything but a card. Hope you like it and TFL!

Tuesday, August 23, 2011

Marci & Luka Birthday Blog Hop!

HIP, HIP, HOORAY, Marci and Luka had a BIRTHDAY!
On August 1st Marci and Luka finally turned ONE and we're having a blog hop to celebrate! Even though I'm no longer on the LLLC DT, I (along with other alumni and friends) was invited back to join in the celebration! If you came from Leanne's blog, then you're on the right track. However, if you just came across my blog, you'll want to start at Becca's blog because all this awesome eye candy is not to be missed!

On top of the special guest bloggers, LLLC is offering up a HUGE BLOG CANDY for this exciting event - Take a look at this prize package:

Click to play this Smilebox collage
Create your own collage - Powered by Smilebox
Customize your own photo collage
This Blog Candy contains the following:
~ Set of 12 Copic Markers in NEW 2011 colors
~ Set of Spica Pens
~ Pack of X-Press Blending Cardstock
~ New Scor-pal and pack of Scor-Tape
~ 3 sets of 12x12 Basic Grey Collections paper packs
~ $20 gift certificate to the La-La Land Crafts Store

To be eligible for this FABULOUS blog prize, you must follow 3 easy rules that are explained on the La-La Land Crafts Blog. You have until August 31st to enter and the winner’s name will be drawn on September 3rd.

*****And now on to the show!*****

As soon as I saw Buccaneer Marci, I immediately thought of a birthday project with a pirate-y saying and here it is (you can click for a larger picture):

BuccaneerMarciPail1a
This is a 5" tall clear pail that I got from my local craft store. I used Make the Cut to design a divider for the pail and even printed the sentiments through MTC! In case you can't quite see it, the bottom says "It's y-arrr birthday!"

I watercolored Marci with just brown Tombow markers then cut her out and popped her up with foam boosters. I inked and crumpled the divider before I stuck her on to look like something old (like a treasure map).

Here's the back of the pail:

BuccaneerMarciPail1b
The top says "Enjoy your booty!" I filled this section with some chocolate coins and some cash with iridescent filler.

I hope you liked my project and thanks for hopping along with us! Your next stop is the incredibly talented Pops.

Monday, August 22, 2011

Big Pressie Tia

I finally have a stamped card for you! I decided to play in the current Some Odd Girl challenge - use complimentary colors. I chose blue and orange and here's what I came up with:

BigPressieTia1
I printed Big Pressie Tia onto watercolor paper and colored her with my Tombow markers. The celebrate die cut is from Quickutz.

This is also for Charisma Cardz - Negative Space, and A Spoon Full of Sugar - Happy Birthday. Hope you like it and TFL!

Saturday, August 20, 2011

3 Chocolate Challenge Part 1

When I saw the current Tiddly Inks Challenge - make a wee little project, I was immediately inspired. Well... that first try didn't turn out, but I took another stab at it and came up with this little treat box:

SendMeASignBugg2a
I used Send Me a Sign Bugg (one of my faves!) and the Cosmo Cricket Social Club Mini Deck. I designed the little box and the cutting file for the Bugg in Make The Cut and printed the Bugg onto the cut out through MTC. Finally, I also printed the scraps for the paper piecing and added the text to the sign using MTC. The box is just under 1.5" wide, 1.25" tall and 1.25" deep and holds 3 Dove chocolates.

You can see from this back shot that the back of the Bugg is covered (to hide the Copic bleed-through and just make it look a little nicer) and is tucked into the back of the box (which would normally be the front opening):

SendMeASignBugg2b
And here's a shot to show the 3 chocolates inside and the Bugg pulled out:

SendMeASignBugg2c
After I showed my hubby the project, he said I should challenge myself to make as many projects as I could that hold 3 Dove chocolates (a nice little favor size) and I took him up on the challenge! So watch this space for more installments of the "3 Chocolate Challenge." :)

Thursday, August 18, 2011

Thank You & Hello

Hi everybody! I finally have a couple projects today with some stamping on them (but just a very little)!

One of my fave blogs to look at is Iralamija by Beatriz Jennings. Everything she creates is so elegant and gorgeous! The other day I gave in to temptation and bought some of her digi files so I can try to create projects a little more in her style. Here's my first card:

Bella Rose Butterfly 1
I used her Bella Rose Backgrounds (background and butterfly layers) and Floral Postcards (label layer under butterfly) digital collages, a sketch from Card Positioning Systems and the sentiment stamped on the twill is from the Elegant Greetings set from Your Next Stamp.

The butterfly and label dies are from Spellbinders, the pearls are all from the Mimi Lo Lo Etsy shop, and the twine is from Timeless Twine. I tea dyed it just a bit to make the white strands a little less stark white.

This card is also for the following challenges: And a little tag:

Hello Tag
I used the sketch from Waltzingmouse, Very Vintage Labels No. 4 and Fancy Phrases.

The 2 background papers on the tag are from her Shabby Backgrounds and the little bit on the heart chipboard is from Bella Rose Backgrounds.

Again, I used a little Timeless Twine, also tea dyed.

I know they're nowhere near the beautiful creations that Bety makes, but I'm happy with both and I hope you like them too! TFL!

Wednesday, August 17, 2011

I *Heart* Twine!

I have a couple of Timeless Twine projects to share with you today (sorry - no stamping!). For both projects, I designed them using Make the Cut and cut with my Cricut E (only in use until I get my Zing!).

The first is a little tag/card to attach to a thank you gift:

ThankYouSewMuchTagTwine1
The spool is from the Seamstress Cut It Simple Shapes set from Lettering Delights. I created a little card and also an extra spool to wrap the twine around, then glued the extra spool to the front of the card. The hanging loop is attached to the back panel of the card. I used Pumpkin Orange and White Timeless Twine.

And here's a full size card using Krazy for Kraft Timeless Twine:

ThanksSewMuchTwine1
Just like the tag, I created a base layer and also cut an extra spool to wrap the Kraft twine around. I also tied a bit of the twine around the twill bow to bring it all together.

I hope you like them and another big thanks to Stacy for this fabulous twine!!

Monday, August 15, 2011

Here's a hug!

*ETA: I used my Cricut Expression to cut the shaped card first. Next, I printed the image onto plain printer paper and taped the cut image over the printed image, using my light box to line it up properly. Finally, I printed again to get the image onto the cutout. I did not do an actual "Print and Cut" with this as I have a hard time lining things up just right on my E. Hope this helps!

Hi everybody! I have another non-stamped card for you today. Lettering Delights introduced "Cut It Tiles" last week and wants to see projects using them for a chance to win an LD gift certificate. Well, since I *love* LD, I just had to try!

Cat Hug LD
The cat image is from the No Rhyme SVG set (but in this case, the cat is printed, not actually cut out), the font is LD Little Piggy and for the tiles, I used the Matryoska Tiles.

Unfortunately, you can't see the texture of the tiles too well in this picture, but I can tell you that I tiled every layer of the cat except for the yellow shadow and his beige face. I set the tile size really small so it would just add a subtle texture, but not draw too much attention to itself. The whole thing was designed, printed and cut using Make The Cut software (LOVE this program!!).

I punched 2 little holes on either side of the beginning of his tail and tied 2 strands of Krazy for Kraft Timeless Twine into a bow around it. I hope you like my card and TFL!

Wednesday, August 10, 2011

YNS' 2nd Birthday Blog Hop

Photobucket

Hey everyone and welcome to YNS' 2nd Birthday Blog Hop - we are so happy you are here celebrating with us and our wonderful guest designers! If you have been hopping along and are arriving from Diana's blog then you are right on track! But if you just happened across my blog and want to join in all the fun and games, then you can go to the start at Peggy's blog.

What is a birthday party without games and some AMAZING prizes? Well we have a fun little puzzle for you to solve along the hop and when you do you will be entered into the draw for one of TWO amazing YNS prizes:


Not everyone has a puzzle piece so you need to pay attention, and click on the puzzle pieces, and follow the directions as you find them along the way (3rd party cookies must be enabled to do the puzzle). When you are done put them all together at the end of the hop for your chance to win! You have until Monday, August 15th, at Midnight EST.

*****And now on to the show!*****

Today I have 2 projects (because it's YNS' 2nd birthday!) to share with you. The first uses the new set Yummy in My Tummy (isn't that such a fun name?):

YummyInMyTummy1
I used the August Sketch For You To Try and some adorable papers from the My Mind's Eye Life of the Party 6x6 paper pad.

The image was stamped and colored with Copics, then I added an extra popped up spoon, clear dimensional adhesive all over the glass, and custom dyed bugle beads for the chocolate sprinkles (I just put them on a little disposable plate and dripped brown Copic reinker on them). The sentiment is cut from one of the papers in the pad.

My second project is just a bit more complicated. Here's the outside shot:

MakeAWish4a
And here's the inside:

MakeAWish4b
You can see that the candle flames' "halos" are attached to the front and back layers so they pop out when you open the card! I used the Make A Wish set (one of my fave YNS sets!), Eat Cake and Be Merry (inside sentiment), the MME True Blue 6x6 paper pad and Make the Cut. I can't take all the credit though - the idea came from an old book I was looking through called "Making Great Handmade Cards" from Hot Off the Press. The card in the book had hand-cut layers and I knew I could do it more easily with MTC and my Cricut!

The whole card is cut through MTC except for the individual candles. For those, I stamped the flames on white and colored with Copics, then paper pieced the bottoms. Even the sentiment banners were cut through MTC! Finally, I finished the card off with some pumpkin orange and white Timeless Twine.

There are also lots of amazing deals right now in the YNS store to celebrate and you don't need any code! The next stop on the hop is the totally fabulous Carole! Good luck and happy hopping! ~Maureen

YNS Birthday Puzzle Piece

Saturday, August 6, 2011

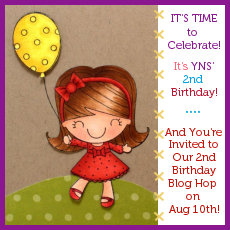
Share the YNS Birthday Badge Contest!

Photobucket

Can you believe that YNS is turning 2?! We're going to celebrate on August 10th and would like as many of you to join us as possible!

Our talented DT member Jenny made this adorable birthday badge for us to post on our blogs so we're asking you to please grab this badge and post it on your blog plus tell all your friends to do the same!

Please check out Karen's Blog Post for all the details on how you can enter to win this adorable new release stamp:
TFL and I hope to see you all back for our big 2nd Birthday Celebration!

Friday, August 5, 2011

Happy Halloween!?

Yes, even though it's only the beginning of August, I have a couple of Halloween projects to share with you today! I wanted to play with the Orange Licorice Twist Timeless Twine from Stacy so I came up with a couple of fun pails using clear minis I got from my local craft store. The first one is meant to hold Halloween candy (I don't currently have any so I just stuffed some little bags of fruit snacks in there):

Mini Halloween Candy Pail 1a
I designed the whole thing in Make the Cut and cut with my Cricut (in use only until I get my KNK Zing - I can't wait!!!).

For the bat, I used Lettering Delights' DB Boo Ya and the sentiment was done with LD Little Piggy.

For the candy pail, the bat is actually cut out of the black layer so you can see what's inside, and then the letters were cut out separately of orange patterned cardstock and glued on the black layer. I then tied 2 strands of twine on each side of the handle into bows:

Mini Halloween Candy Pail 1b
My second project is meant to hold a battery powered tealight candle:

Mini Halloween Votive Pail
I used basically the same design as the candy pail, but this time I also cut out the letters from the black layer so the light would show through them. I glued a piece of orange vellum to the back of the black layer so you can't see the actual tealight candle through the bat cutout.

Here's a shot of what it looks like in MTC:


To finish it off, I glued twine all around the metal handle.

BTW, if you haven't already "liked" the Timeless Twine Facebook page, go ahead and do it now - ‎if Timeless Twine reaches 300 Page likes they will be giving away 3 Spools of Classic Timeless Twine colors! For extra entries, be sure to share and refer your friends and have them mention that you sent them.

I hope you like my projects and TFL!